
Ready to Jazz Up Your Tumblr? Let’s Talk HTML!
So, you’ve got a Tumblr blog, huh? And you want to channel your inner web designer by changing up that HTML? First off, kudos to you for wanting to dig into the depths of Tumblr customization—it’s like peeking behind the curtain of a very pixelated wizard show! Just imagine your blog morphing into a unique digital wonderland that reflects your personality. We all know that generic themes are sooo 2010. Let’s dive right in and prepare to make your Tumblr pop!
Step 1: Find Your Blog Dashboard
Click the name of your blog at the top of the Dashboard or under the list icon at the top. This is where all the magic begins! Your Dashboard is essentially the control center for your blog-tastic adventure. You can’t drive a racecar without knowing where the steering wheel is, right? Once you click your blog name, you’ll be transported to the mystical land of customization, where infinite possibilities await.
Step 2: The Customize Button Awaits
Next, we’ll want to give that Customize button a good click. Click “Customize” on the right column. It’s sitting there, begging for attention, looking all pretty and inviting. Once you click it, you’ll find yourself in a realm filled with options, selections, and all sorts of graphic wonders that you can tweak to your heart’s content. It’s like a buffet of design options—go ahead and gorge yourself!
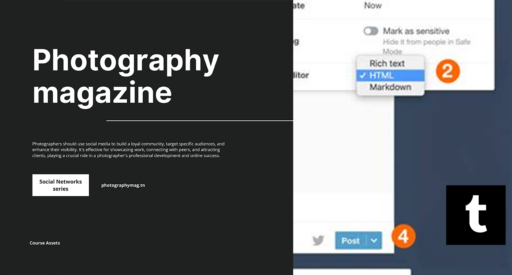
Step 3: Editing Your HTML: Enter the Code Awakens
Now, the moment of truth has arrived. You’re going to click “Edit HTML” below the theme thumbnail on the left. Are you nervous? You shouldn’t be. This is where the fun begins! The HTML editor is like the secret lair of your blog. You can dive in and make changes that will leave your readers wondering if they’ve stumbled upon a secret Tumblr dimension.
Understanding HTML: The Language of the Web
Before diving headfirst into the coding ocean, let’s fish out some basics about HTML (Hyper Text Markup Language). Think of HTML as the skeleton of your website. It’s what holds everything together. Below are key components to keep in mind:
- HTML Tags: These are the building blocks. They encompass your content, like an HTML sandwich!
- Elements: Everything you see on a webpage—from text to images to links—is an element.
- Attributes: These are like the little details that add flair (think font, size, color, oh my!).
Now that you’re aware of these terms, having a basic understanding of HTML will make the transformation of your Tumblr blog a walk in the park (or a stroll through the digital jungle)!
Pro Tips: Navigating the HTML Editor
The HTML editor might look intimidating at first, but fear not! Here’s some magical wisdom to guide you through:
- Backup Your Code: If you’re about to make significant changes, don’t forget to copy your existing HTML. You wouldn’t want to lose your hard work just because you decided to switch up a few colors!
- Use Comments: Commenting your code isn’t just polite; it’s practical! Use to help you remember what certain sections do.
- Keep It Organized: Use whitespace and indentation. An organized code is as refreshing as an ice-cold lemonade on a hot day!
- Test Your Changes: Don’t rush! After making changes, preview your blog to ensure everything looks and works as intended. A little patience goes a long way in avoiding an HTML fiasco.
Common Customizations to Consider
What to change, you ask? Well, my friend, the digital world is your oyster! Here are some common customizations that will instantly give your blog a personality boost:
1. Change Colors and Fonts
Want your text to pop? Use CSS (Cascading Style Sheets) to change fonts, colors, spacing, and more! Here’s a quick snippet: css body { background-color: #FeelYourColor; /* Replace with your choice! */ color: #AnotherColor; /* Yep, you got it—pick your color! */ font-family: ‘Arial’, sans-serif; /* Change the font */ } Transform that digital dullness into a vibrant celebration of hues!
2. Add Images and Graphics
A picture is worth a thousand likes! Want to show off your latest doodles or photo series? Here’s how you can add images: html <img src=”your-image-url-here” alt=”A lovely description of the image”> Make sure your images are optimized for that effortless loading speed—no one likes a loading bar, trust me.
3. Customize the Sidebar
Your sidebar is like the cozy corner of a cafe. Fill it with widgets, custom links, and anything else that showcases your personal flair! You can add:
About Me
Let your visitors know what’s up!
4. Integrate Fun Widgets
Want to make your blog interactive? Consider adding widgets! Finding a cool audio player, playlist, or even a fun quote generator is a great way to engage your audience. HTML code can be simple for that:
5. Play with Layouts
Feeling ambitious? You can tinker with layouts somewhat like a structural engineer! Want that grid layout? Here’s how to use it:
1 2 3
Adjust the CSS styles to give each grid item its own flourish!
Testing and Tweaking: The Journey Doesn’t End Here!
Once you’ve made all your changes and feel like a wizard with the mightiest coding staff, don’t skip the all-important Preview option! This feature lets you see how your magical creations will look before you finalize them. You can tweak and twiddle as necessary. Remember, Rome wasn’t built in a day, and neither will your artistic masterpiece!
From Dreaming to Living: Publishing Your Changes
When you’re content with your fantastic changes, grab your excitement and hit that Save button like it’s the finish line of a marathon. Hold tight—now, you can publish your changes and let the world behold your dazzling creation!
Final Thoughts: Embrace Your HTML Adventure!
Changing Tumblr HTML can feel like a wild rollercoaster of coding joy! From customizing colors to crafting the slickest layouts, the only limit is your imagination (and maybe a bit of coding know-how)! Just remember to keep things fun, keep learning, and enjoy the ride. Because at the end of the day, it’s all about expressing yourself and creating a digital home that speaks volumes about who you are!
Now go forth, dear Tumblr aficionado, and unleash your creativity upon unsuspecting blog visitors everywhere! 🎉